
Building #759 (cutting out chine logs and side panels with a template and a router)
By Eric ComstockI first learned of the PDR while looking into the Texas 200 (something I still hope to participate in). I read about all these guys in these little home made boats going out and doing what everyone said was impossible. It REALLY sounded like fun. So I started to investigate this strange little boat. The more I read about it, the more I liked it. Now I know a little about sailing and a little about boats in general. I know a little (not much) about wood working and have some general tools. I've never built anything as big as a PDR or even considered that I might be able to build a boat.
After reading up, downloading and examining several sets of free plans and learning as much as I could without having ever seen one. I decided that a 1/4 scale model would be a good starting point. It would let me get a feel for the construction techniques and when complete it would give me a better idea of just what one of these boats would look like. I spent about 1 week, working for 30 minutes each day to cut the sides, attach chine logs and glue on the bottom. I then had a 1/4 scale "3D" Puddle Duck Racer! (Would 1/4 of "3D" be "3/4D" ? ) Here is a picture of the 1/4 scale model sitting on top of the full size Duck.
I learned a few things during that "micro" build:
First, my side panels were all different shapes. I
tried to cut them out in pairs but it didn't work well and no matter how
much I sanded them, I could not get them to all look the same.
I could not bend the "chine logs" (1/4 round molding) without cracking them. I ended up with a bunch of 2" long pieces.
Getting the bottom to accept the curve on the bottom without cracking was an issue.
It wound up very "out of square".
I know that some of the issues were due to the fact that while the boat
was scaled down, the building materials were not (1/4" birch and 3/4"
"Quarter Round" molding), so it is not REALLY a fair comparison.
But I feel like I learned a lot from the exercise.
Of all of that, getting the sides to match and getting the chine logs on worried me the most. I knew that I needed to find a better way if I were going to build a full size boat. I spent a long time thinking about it and finally decided that I needed a template to use to cut them out. After talking to a bunch of people on John Kohnen's Yahoo group , it seemed that I needed to use a router to do the job. I didn't own a router. I had never used a router. I wasn't even sure exactly how one would work. But I didn't let that stop me. I ordered one on-line and was determined to make something happen.
Even before I bought the router I had gotten together with a couple of others in the Houston area who were interested in building PDRs. We went on a field trip to look at a mostly complete boat someone else had North of town. We even got as far as going to buy wood, but after trips to several Big Box stores we could not find a decent sheet of plywood if our lives had depended on it. After some research I decided to buy some REALLY Nice marine plywood from Houston Hardwoods for $40 a sheet. I wasn't THAT much more than birch at HD and the difference in quality was HUGE. Plus marine plywood is not supposed to have any voids and should use better glue. So I went and bought 3 sheets and got to work.
Here is what I did:
1. I made a template for the side panels:
- I started with a full 4x8 sheet of 3/4" plywood that I happened to have laying around.
- Measuring up from the bottom, I made a line across at 19" (18" hull + 1 inch to cut off a rough edge) and I penciled in the layout of a full 18" hull side panel. I marked out all of the bottom stations, then checked their locations three time just to make sure that they were right.
- I put nails in at each station and used a piece of plexiglass that was handy to mark out the bottom curve.
- Once I had the whole thing laid out, I re-checked each of my measurements to make certain that I had not made any mistakes.
- Using a jig-saw, I rough cut the plywood sheet. I made the first cut about 1/8" -> 1/4" below the mark, being sure not to remove too much wood.
- I used a belt sander to remove the last bit from the bottom. I Worked my way across, removing a little at a time, trying to round out the curve as best I could.
- Using a circular saw I made the straight cut for the bow from to the most forward part down until it met the curved bottom cut.
- The end result was a 4x8 sheet of 3/4" plywood that looks like a PDR on one side. I now had a template.
2. Next I went to Houston Hardwoods and bought three sheets of "AquaTek" 1/4" marine plywood.
- While I was there, I asked to to have two of the sheets cut into 16" x 8' sections. I was very clear that I wanted two 16" sections plus what ever was left, not thirds.
- So they cut two 16" sections using their very efficient table saw, leaving a 15 3/4" piece. Since they did this with two of the three sheets, I now had;
- 1 full sheet,
- four 16" x 8' sections and
- two 15 3/4" x 8' sections.
- The 16" x 8' sections would be the side panels (Side air box design).
- One of the 15 3/4" pieces would make the front and rear transoms,
- The other would be the deck, to cover the side air boxes.
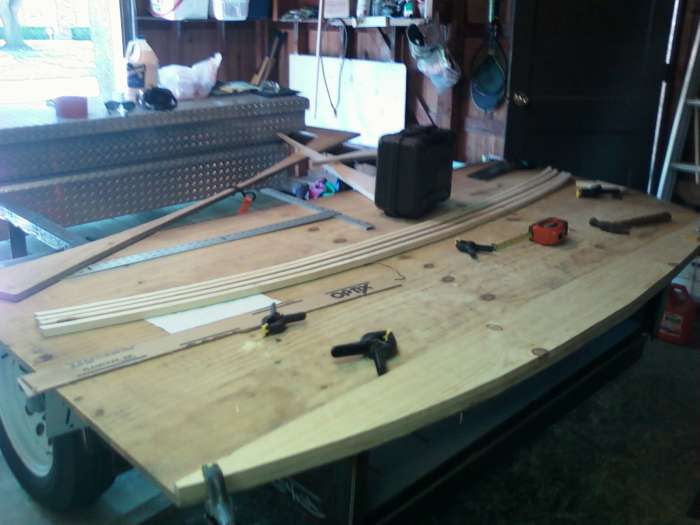
3. I cut the chine logs.
- I began with a 12" x 8' plank. I looked through a lot of planks at the box store. I finally found one that looked like most of the knots would be in the scrap. If I had paid twice as much, I could have bought a plank without so many knots, but I thought this one would work out OK.
- I positioned it on the template and lined it up with the rear transom and flat spot on the bottom. Then I traced the top onto the template. I will use that mark, and measure down from there later.
- I made the first cuts, cutting two pieces off of the plank. Now the plank had a PDR shape on one side. If I were making a 12" hull I could have used the plank for a side at that point. But I wanted chine logs not "plank sides".
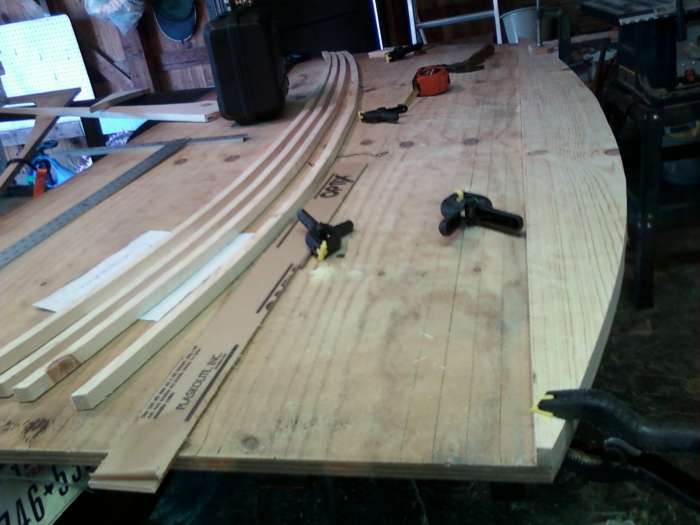
- I slid the plank down 1.25" below the first line and clamped it in place. I then marked a new line (I would use that to position the plank for the next chine log) .
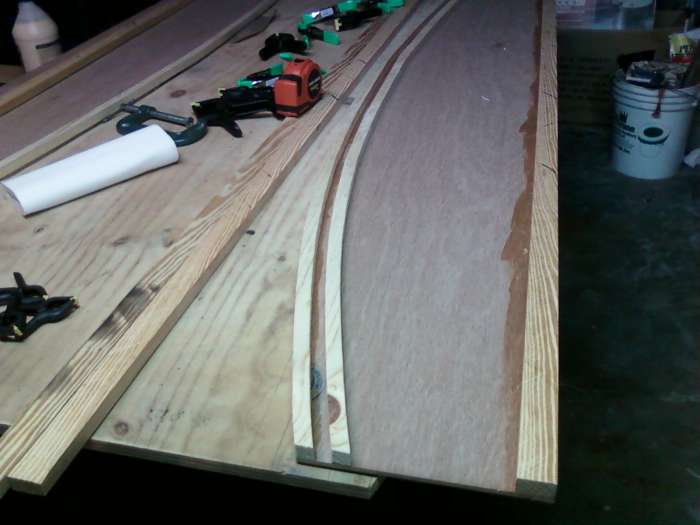
- I cut it again, along the full length of the template with a 1/4" router bit. It yielded a final minimum thickness for the chine logs of about 3/4". The clamps, that were holding the plank down, prevented the chine log that the router cut off from dropping. I had to move a couple of clamps during each cut to get the router past them, but each only took a moment.
- I repeated the last 2 steps three more times.
- Here you can see the lines I drew on the template as I was moving the plank down. Each time I cut a chine log off, I would move the plank down, line it up with the rear transom and check several spots going across to make sure it was the same distance below the line above.
4. I cut the side hull panels:
- I marked the template for a 16" hull by measuring down 2" from the 18" hull top mark.
- I carefully positioned the first 16" x 8' panel on the template.
- With the uncut 16" panel even with both the rear transom and flat section on the bottom of the template, it lined up perfectly with the line I had drawn at the 16" point.
- I clamped the panel down and re-checked the alignment with the stern transom, the flat part of the bottom and the line drawn at 16". Everything lined up, so I drove three 1" nails, 1/2" into the template at the top edge of the first panel. These were used to help align the other three panels.
- Cutting the panel was a simple matter of running the router down the side of the template, cutting the panel as I went.
- I pulled the first panel off and cut the next three in about five minutes.
- Once all the side panels were cut out, I lined them up next to
each other and they were all identical. The only sanding needed
was to remove some stray "hairs" left by the router.
- I now had four side panels and four chine logs that EXACTLY matched. I don't mean they were pretty close, I mean they were exact, ready to assemble, no sanding or bending required.
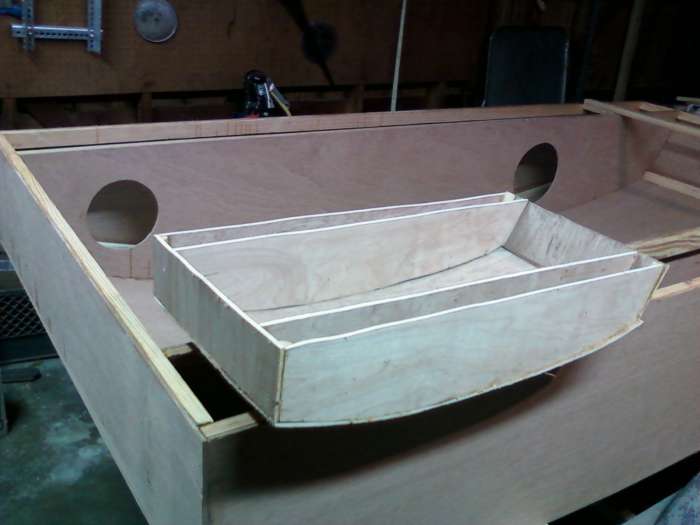
5. I glued the chine logs onto the side panels.
- The top logs were made by cutting a 3/4" section off of a 2"x10"x8' board. Nothing special there. I used the full 1.5" height of the 2x10 to add a little strength to the side air boxes for sitting on them, but they are 3/4" thick, the same as the plank the lower chine logs were cut from..
- Top and bottom chine logs were the same to attach. I spread the glue on the log and the panel with a foam brush and clamped them together. Since the bottom chine logs were an exact fit to the side panels, no bending or coercion of any type was needed. They were really easy to attach. In the picture below you can see the first side panel with the top and bottom "chine" logs glued on and another chine log resting next to the one that was glued on.. You can also see the second side panel with the lower chine log glued on and the upper log about to be glued.
Assembly of the side and end panels was pretty straight forward. Nothing different than what is documented elsewhere. I did have one more idea that I wanted to try out. I thought that if I used Taper Head Brass Screws and counter sunk them into the 1/4" plywood bottom, I would be able to leave them in place. Unfortunately I soon discovered that if I drilled the counter sunk hole deep enough that the brass screws would be flush, screwing them down enough to pull the plywood bottom into place would pull the screw through the bottom. I handled this with bigger screws and fender washers in those places. I still pre-drilled the holes but I did not try to counter sink any more of them. After the glue had dried, I went back and removed all of the screws and glued pieces of skewers in their place. Next time I will use pan head screws and plan on taking them out.
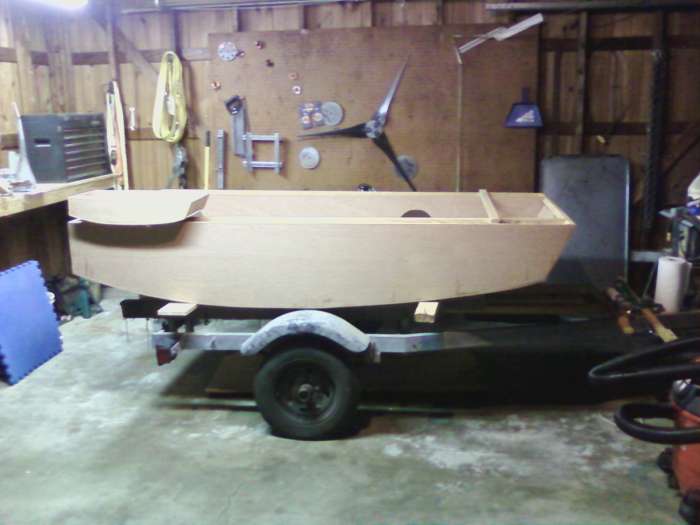
I am VERY happy with the final product. The sides mated with the
bottom so cleanly that I expect I could have put it in the water with no
more work and it would not have leaked. The pieces fit together MUCH more precisely that I had even hoped they would.